
LEARN. CONNECT. OPERATE.
Your service knowledge base
Practical tutorials for attendance, payroll, assets and employee services.
24 tutorials
01Set up your company
Ask the platform administrator to create your company and assign its plan.
Sign in through the Company login using your invitation or assigned credentials.
Open Settings and confirm company name, branch location and Asia/Riyadh timezone.
Create departments and branches before registering staff and devices.
Invite company administrators, HR Agents, HR Managers and Assets Agents according to their responsibilities.
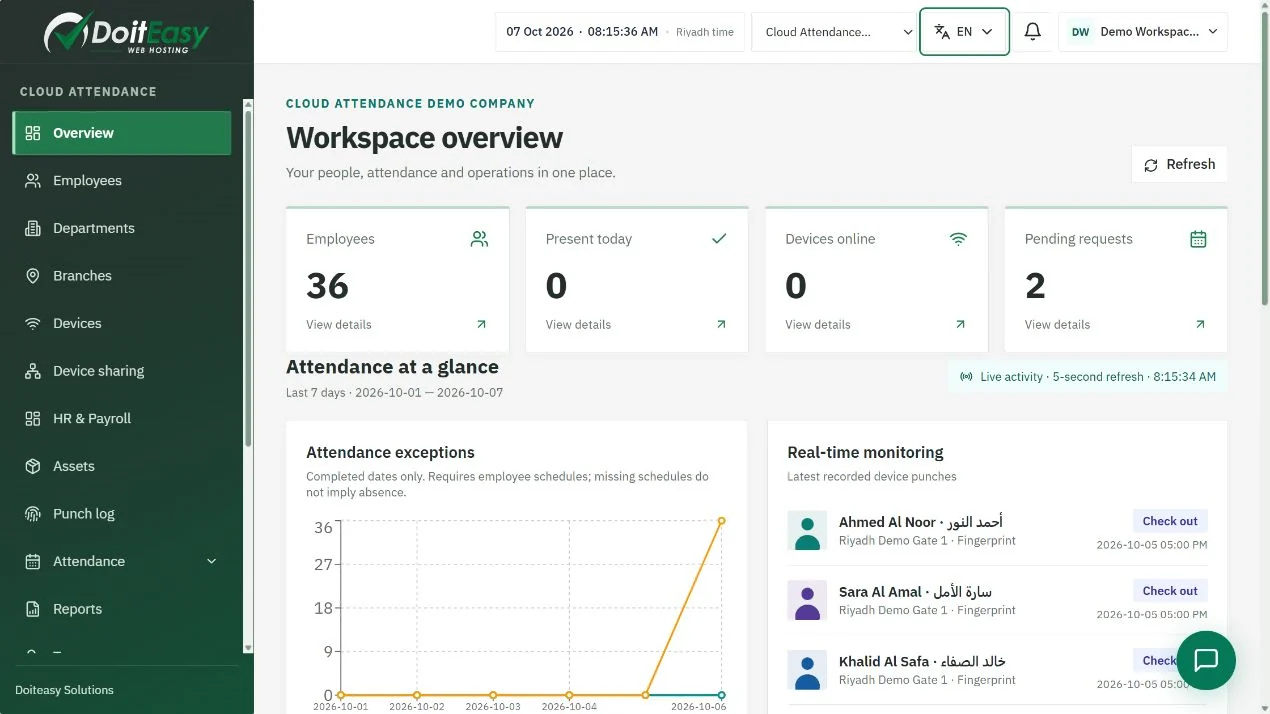
Open the overview to check people, devices and attendance before beginning daily work.
Confirm the result: You can select the correct workspace and see only its records.
02Enable HR, Payroll and Assets
Review your effective plan with the company or platform administrator.
Confirm employee, device and branch limits before importing data.
The Global Admin enables the HR and Assets entitlements in the applicable plan.
In company settings, enable each entitled add-on and save the reason for the change.
Assign the relevant roles and permissions to the people who will use the modules.
Refresh the workspace and confirm the enabled sections appear in the menu.
Confirm the result: An add-on needs both plan entitlement and company activation.
03Connect a ZKTeco device to the cloud
Confirm your terminal and firmware support ADMS / PUSH attendance. Menu names differ by model; check its official manual.
Open Devices in your company. Register the exact serial number, name and branch; enable the device. Copy the assigned cloud host, port and communication key if the connection instructions require one.
On the device, configure Ethernet or Wi-Fi with a valid IP, gateway and DNS. Check it can reach the internet.
Open Menu > COMM / Communication > Cloud Server Settings / ADMS. Select ADMS as server type when that choice exists.
For the standard Doiteasy HTTPS deployment, use cloudattendence.com as Server Address, port 443, domain-name mode ON and HTTPS ON. Do not enter a dashboard URL or /iclock path in the host field. If your device uses a full URL field, follow its manual and the company connection instructions.
Leave Proxy OFF unless your network administrator provides proxy settings. Apply the assigned communication key only when supported and required. Save, then restart communication or reboot as the model requires.
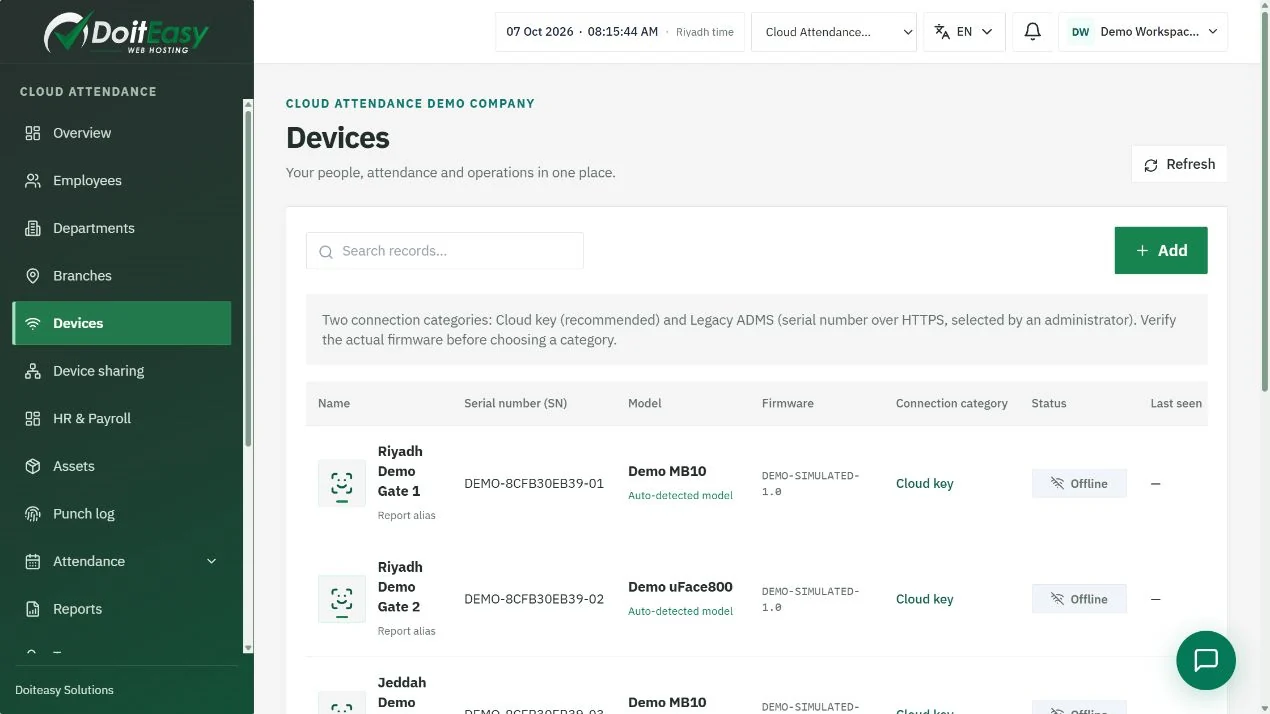
Wait for the device to appear online. Perform a real test punch and verify employee code, device and Riyadh time in the punch log.
If the firmware cannot use the supplied HTTPS endpoint, ask support for an approved compatible gateway or device-specific endpoint. Do not switch to an arbitrary port or remove TLS protection.
Confirm the result: Online status plus a matching test punch confirms the connection. A biometric face template alone is not an employee photo.
04Troubleshoot an offline device
Check power, the network cable or Wi-Fi signal and the device network indicator.
Compare serial number and branch with the enabled cloud record.
Verify gateway, DNS, server host, port and HTTPS setting together; a valid IP alone does not prove internet access.
Ask IT to allow outbound traffic to the supplied cloud endpoint and check any router, proxy or TLS inspection restrictions.
Confirm device time and supported firmware. Restart communication, then watch the latest connection time in Devices.
Make a fresh punch. If it is still missing, send support the model, firmware, serial, connection settings without secrets, and test time.
Confirm the result: Do not delete attendance history or factory-reset the device during a connection check.
05Import employees and profile photos
Open Employees and select Sync from devices, or use the import panel for a specific device.
Keep the device online while it returns supported employee names, card numbers, photos and templates.
Use the same employee code on the device and in the company profile. Codes are matched within the company.
Review unlinked profiles and plan capacity, then retry linking when the required limit is available.
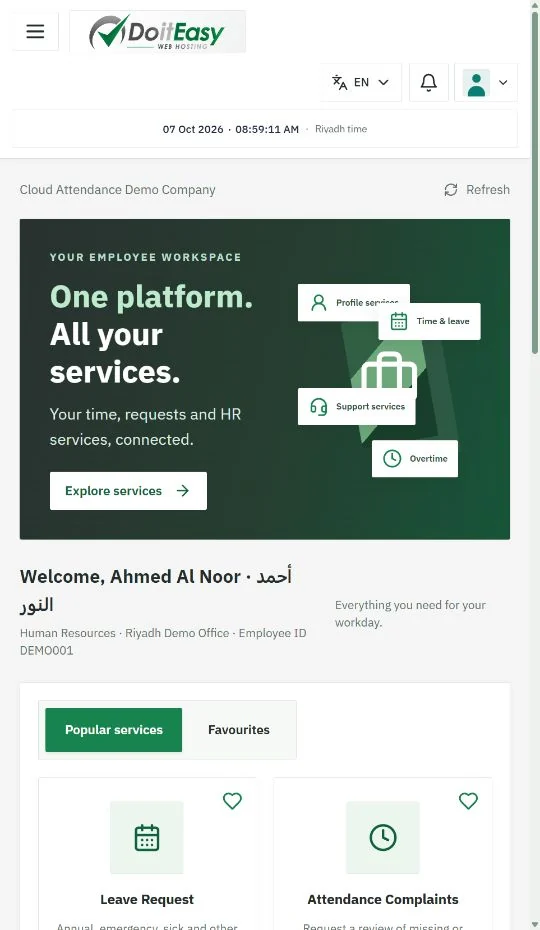
Open the employee photo/name card to view department, branch, device details and weekly attendance.
A device photo appears when the firmware sends a supported image; otherwise notifications use an uploaded employee profile photo or the default avatar.
Confirm the result: Importing a device profile does not create a cloud login; invite the employee separately.
06Prepare shifts and working calendars
Create the working shift and confirm start, end, break and applicable grace settings.
Define weekly working days, holidays and any company calendar exceptions.
Assign the appropriate shift and branch to each employee.
Check the company timezone before reviewing late arrivals or early departures.
Review overnight shifts and missing punch pairs with the attendance manager.
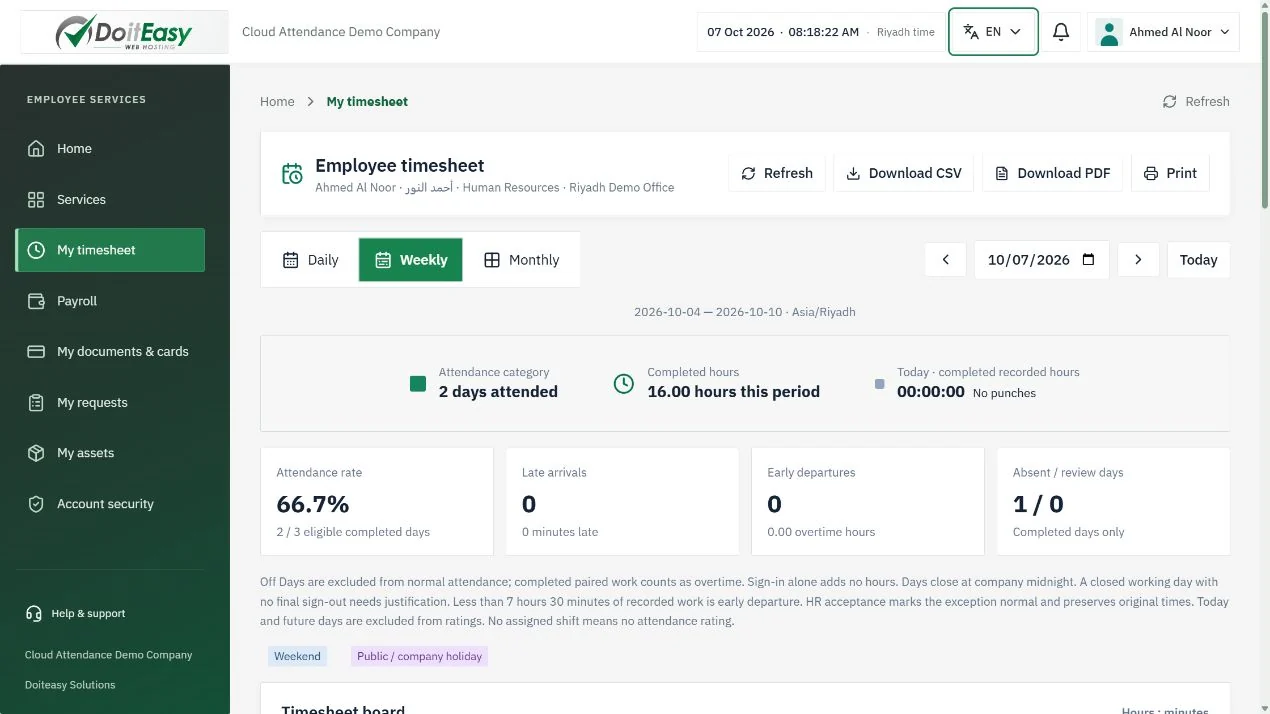
Open a sample timesheet to confirm the calendar and scheduled days match the intended period.
Confirm the result: Attendance ratings need a schedule; approved leave and holidays are excluded from eligible days.
07Monitor attendance and notifications
Open the company overview to monitor activity and connected devices.
Check the arrival and departure popup for employee name, code, avatar and device.
Open the notification bell for recent punch events; use View punch log for the full record.
Use Employees to compare today’s recorded hours and attendance rating.
Select the information icon beside Employee directory to read the weekly rating explanation.
Click an employee card for the detailed weekly breakdown and device links.
Confirm the result: Missing punch pairs require review; displayed hours are based on recorded sign-in and sign-out pairs.
08Review timesheets and export reports
Open an employee’s Timesheet or the Attendance reports section.
Select the employee, date range and company timezone.
Inspect daily punches, scheduled days, late minutes, missing pairs and leave exceptions.
Review disputed days through the available attendance review or complaint workflow.
Export the report as PDF or use Print after checking the selected language and filters.
Keep the report period and review evidence with the payroll preparation records.
Confirm the result: Check totals against source punches before using attendance results for payroll.
09Request and approve overtime
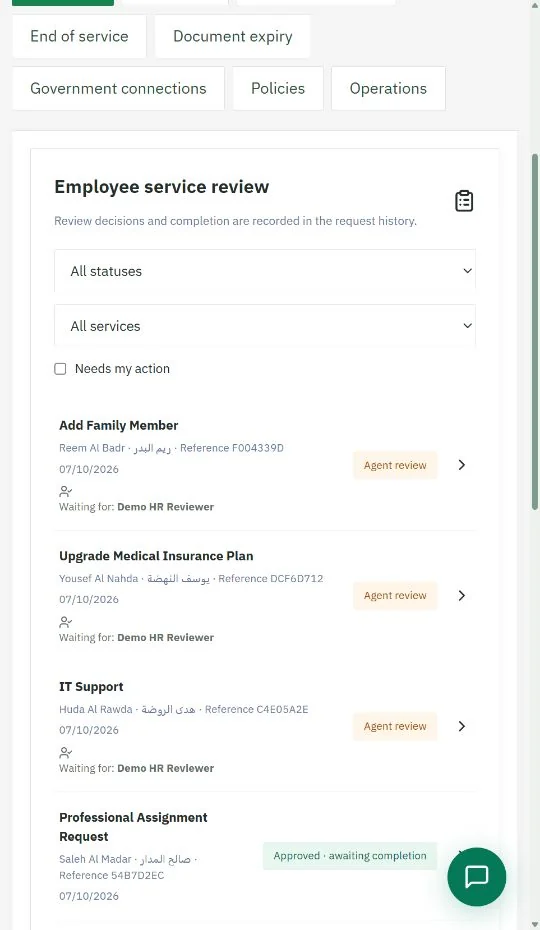
The employee opens Services or My requests and chooses the overtime request.
Enter the date, requested hours, reason and any required attachment.
Submit and check the current reviewer in the request timeline.
The HR Agent reviews the request and forwards it to the HR Manager.
The HR Manager approves or rejects it with the decision recorded.
Payroll staff include approved overtime in the applicable pay period after checking the configured policy.
Confirm the result: A submitted or reviewed request is not an approved payroll item.
10Back up device data safely
Open the device import panel and receive the latest supported profiles and data.
Create a backup version from Device backups.
Review the recorded employee, template, photo and attendance counts.
For restore, select a version and confirm the destination device.
Confirm template and photo compatibility before including biometrics.
Monitor queued, acknowledged, pending and failed restore commands.
Confirm the result: Restore merges supported profiles; it does not restore firmware, device passwords or replay archived attendance.
11Prepare personnel and salary profiles
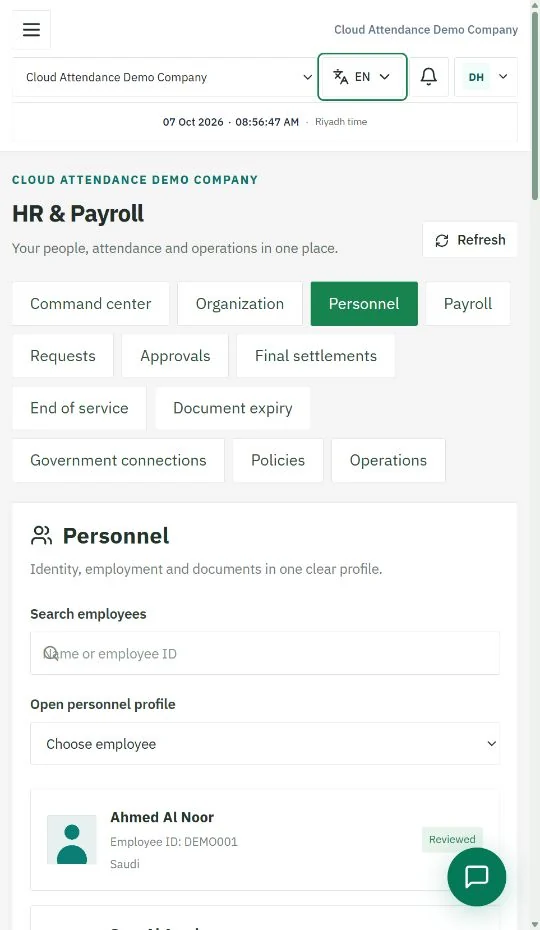
Enable the HR add-on, then open Personnel and select an employee.
Record joining date, nationality group, identity documents, contract reference and cost center.
Enter the basic salary, housing, transport and applicable fixed allowances.
Record the bank IBAN and the insurance base, category and references verified by your payroll team.
Review identity and contract expiry dates and upload approved employee documents when needed.
Save the profile and check that the employee is ready for the intended payroll period.
Confirm the result: Use verified policy values; sample data and configurable calculations are not an official government determination.
12Run the monthly payroll cycle
Select the payroll month and eligible employees.
Confirm salary profiles, attendance review, paid days and approved leave before calculation.
Include approved overtime, variable allowances, loans, advances and authorized deductions.
Calculate the period and review each employee’s earnings, deductions, gross and net salary.
Resolve review warnings and obtain the required company approvals before publishing.
Publish the approved payroll and make payslips available in the employee portal.
Confirm the result: Always review calculations and approval status before publishing or paying salaries.
13Download payslips and official documents
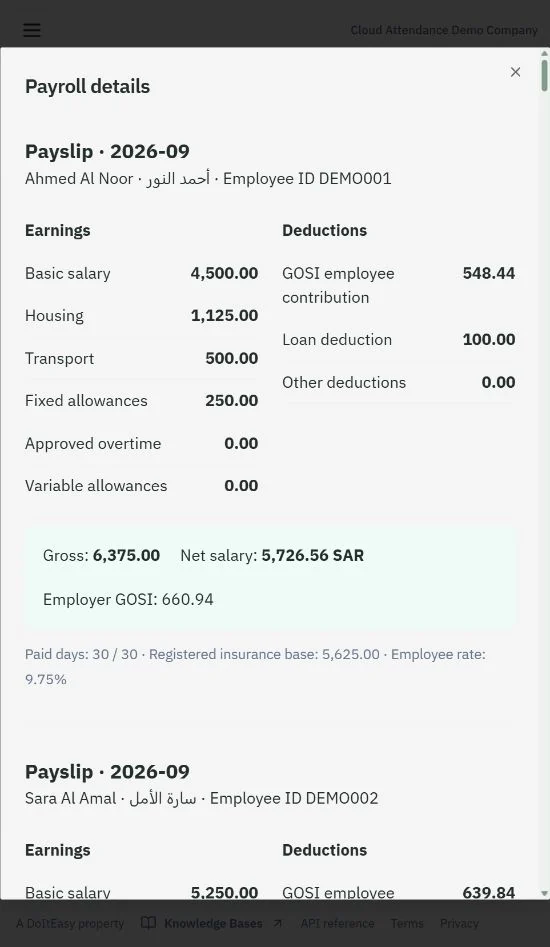
Employees open Payroll to view published payslips for their own account.
Choose the month and review earnings, deductions, paid days and net salary.
Choose Arabic or English before downloading so the document uses one language and the correct direction.
Use Download PDF or Print to keep an official copy.
For approved service letters, open My requests or My documents and select the available document.
Contact HR if a payslip is unpublished, missing or under review; employees cannot publish payroll themselves.
Confirm the result: Company branding and an uploaded transparent stamp can appear on supported official documents.
14Prepare WPS and government connections
Open Policies & connections or the relevant API configuration page.
Record approved access details for each provider when your company obtains them.
Keep Qiwa, GOSI, Mudad/WPS, Muqeem and Absher connections disabled until credentials and the approved service contract are available.
For payroll files, obtain your bank’s current WPS/SIF specification and validate the account and pay data.
Review and export supported files only after your payroll team checks their required format.
Track provider responses and errors when a configured integration is enabled.
Confirm the result: Configuration readiness does not mean a provider connection is live or certified.
15Manage loans and final settlements
Record an authorized loan or advance with amount, repayment terms and employee reference.
Review approval and repayment schedules before including installments in payroll.
For an employee leaving the company, verify service dates, reason and approved salary components.
Review leave balances, unpaid amounts, outstanding loans and assets still in custody.
Use final settlement and end-of-service tools with the company’s current verified policy.
Approve the reviewed settlement and download its supporting documents.
Confirm the result: Final entitlements require review against the applicable contract and current rules.
16Create the company asset register
Confirm Assets is included in the company plan and enabled in company settings.
Assign an Assets Agent with the relevant inventory permissions.
Open Assets and create an asset with a clear name, type and model.
Record the serial number and barcode; keep identifiers unique and traceable.
Add the branch, condition and other available inventory details.
Save and check the asset is available before creating an employee assignment.
Confirm the result: Serial numbers and barcodes identify inventory; they should not be shared between distinct assets.
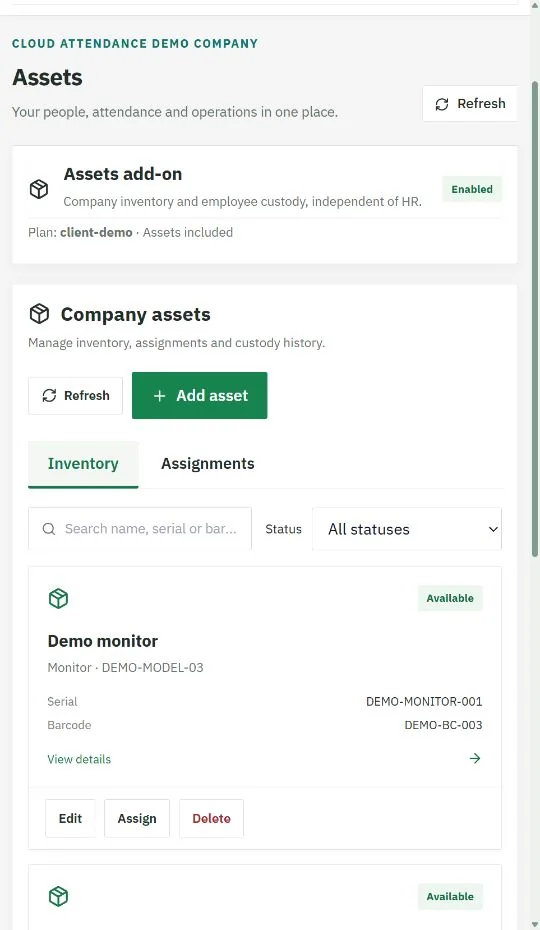
17Assign an asset and obtain acceptance
The Assets Agent selects an available asset and the employee who will receive it.
Create the assignment and record the handover information requested by the form.
The employee opens their asset section in the self-service portal.
They review the type, model, serial, barcode and condition before accepting.
After acceptance, the employee cannot revoke that acceptance.
The Assets Agent or company manager monitors custody and retains the assignment record.
Confirm the result: Acceptance is an employee action; managers release custody through the authorized return flow.
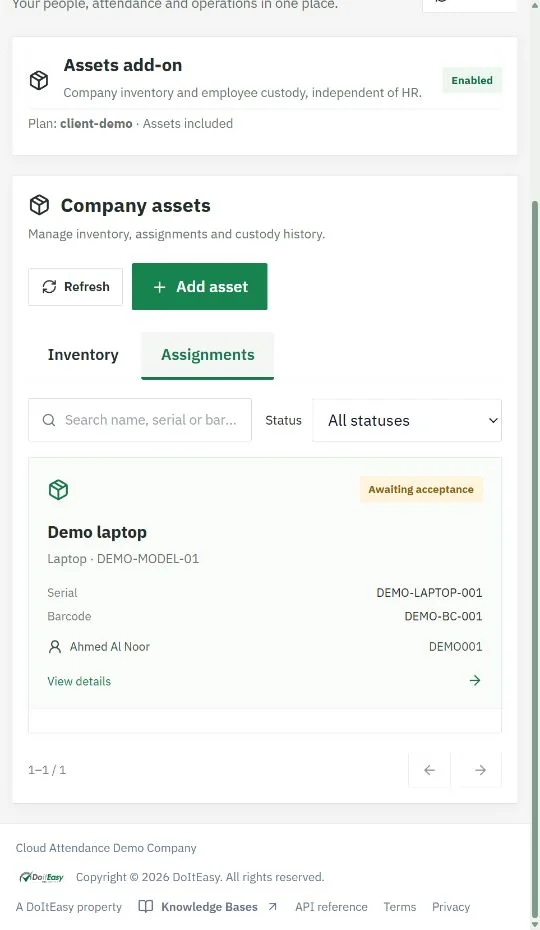
18Release, return and reassign assets
Open the current employee custody record and verify the asset identity.
Inspect the returned device and record its condition or any damage.
The Assets Agent or company manager releases the assignment using the authorized action.
Confirm custody is closed and the asset status matches the return result.
If available for reuse, create a new assignment to the next employee.
Review custody during offboarding and keep the history for inventory reconciliation.
Confirm the result: Employees cannot release their own accepted custody.
19Use the employee portal
Sign in through Employee login using the account invitation and assigned credentials.
Open Home to review your leave balance and available services.
Use My timesheet to inspect your own attendance.
Open Services to submit leave, attendance complaints, overtime or other enabled requests.
Track each request, its current reviewer and the recorded decisions.
Download published payslips and approved documents, and review any assigned assets.
Confirm the result: Employees view their own records and the services their company has enabled.
20Track HR review and manager approval
The employee submits a request with complete details and required attachments.
The request shows that it is waiting for the HR Agent and identifies the responsible reviewer when assigned.
The HR Agent checks the content and forwards it to the HR Manager.
The employee timeline updates to show the manager stage.
The HR Manager approves or rejects the request and records the outcome.
Approved downloadable documents become available from the employee’s request or document section.
Confirm the result: Use the current reviewer and history to distinguish pending review from a final decision.
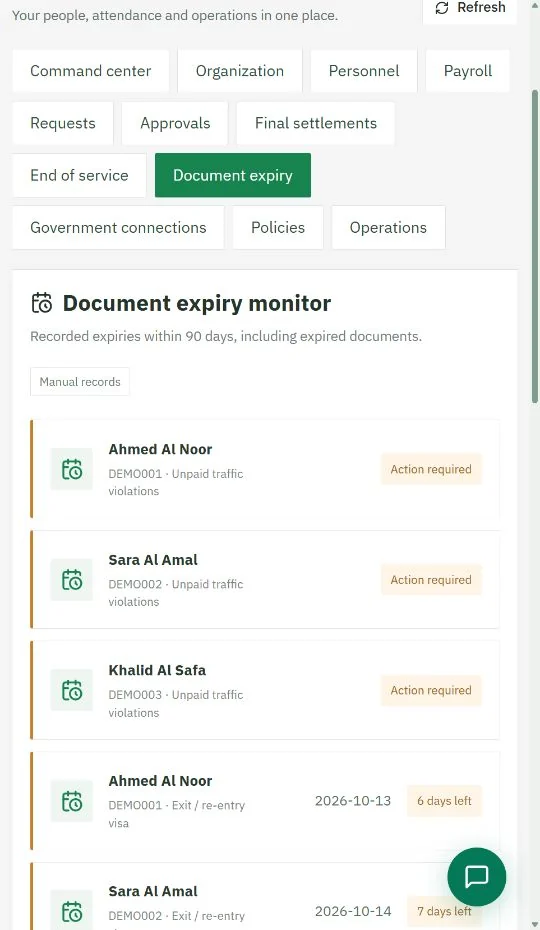
21Monitor identity and document expiry
Enter verified expiry dates for national ID, Iqama, passport, driving license and relevant visas.
Review the employee’s documents and manually verified visa status.
Configure approved provider access before enabling automated external status checks.
Review the monitoring dashboard and HR alerts regularly.
Ensure HR Manager escalation is configured for one week before expiry.
Record renewal evidence and update the expiry date after verification.
Confirm the result: Visa and traffic data need approved external services; an expiry date alone is not a live status check.
22Apply company branding and stamp
Open the company branding or settings section using an authorized account.
Upload a clear company logo and review its display on the portal.
Upload a transparent company stamp in the supported format.
Check a sample official report in Arabic and English.
Confirm the stamp position and that it does not overlap totals or signatures.
Download and print the approved document to verify the final result.
Confirm the result: The company is responsible for authorizing the stamp used on its documents.
23Configure PIN, 2FA and secure access
Open Account security from the account menu.
Set a separate six-digit inactivity PIN and confirm it using your current account password.
After five minutes without activity, enter the PIN to unlock the workspace; five incorrect attempts require sign-in again.
Enable available two-factor authentication and complete its verified enrollment.
If you forget the PIN, sign in again and set a replacement in Account security.
Global Admin can recover user name, login email, password and 2FA from Accounts; security changes are audited and end existing sessions.
Confirm the result: Only Global Admin and authorized workspace admins can impersonate supported accounts.
24Configure email, WhatsApp and API access
Configure global delivery first, then add company email or WhatsApp settings where needed.
A company override is used when present; otherwise the site global channel is used.
For Doiteasy WASMS, use the approved API configuration and device ID; WhatsApp pairing is completed by the authorized phone owner.
Create workspace API keys with the minimum permissions required by the external application.
Use the API 2.0 reference for routes, samples, scopes and limits; supported v1 remains available.
Revoke unused keys and review delivery failures and audit activity.
Confirm the result: Keep API keys, device pairing codes and passwords out of screenshots and client guides.